1. Global Configuration
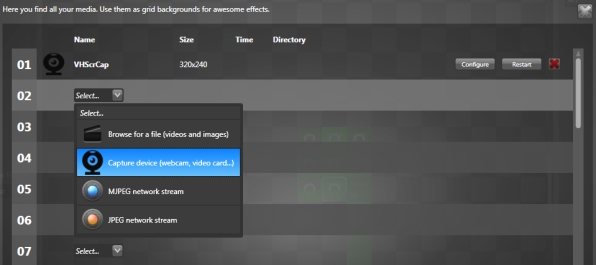
You can use multiple video input devices at the same time (maximum 64). Go in the media manager (Ctrl-U) to configure them. To add a webcam, a video capture card or any DirectX compatible devices, just select the capture device in the drop down box. You can also use a network video stream in the MJPEG and JPEG format.
To use any other media type than a capture device, you need to assign the media to a grid's background in order to start its playback. To do so, go in the Grid/Background menu and select a media to assign it to the current grid. Then from another grid, use a source and link it to any parameter of the analysed video input.
1.1 Capturing Your Monitor Output
In this very common situation, you want to do ambilight with what's visible on same computer running Lightjams and capture the video output directly. Lightjams can directly capture any part of your screen. In the media manager, add a "screen capture" media. You'll then be able to select the screen or part of it to capture.
1.2 Webcam Tip
For better result and higher framerate, disable any auto light parameter. Instead, manually adjust the exposure time and gain to best fit your setup.
2. Link to any slider
Select any slider and click on the video icon. Then you'll be able to play with all video settings.

3. Play
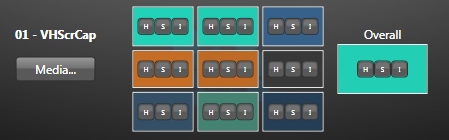
Colors are analyzed in the HSL model - in Lightjams, the L has been renamed I for intensity instead of lightness. You can use any parameter individually. For example, you may want to only use the hue and set a fixed saturation value to compensate for the webcam capture quality loss.
Overall: This is the primary color from the whole video stream.
9 Zones: These zones correspond to actual regions of the video stream. They are like a real-time low res representation of your video. For each zone, you see the detected color.
For each color, you can click on the H, S or I buttons to select it.
To help you getting started, look at the Ambient lighting project in the sample projects.